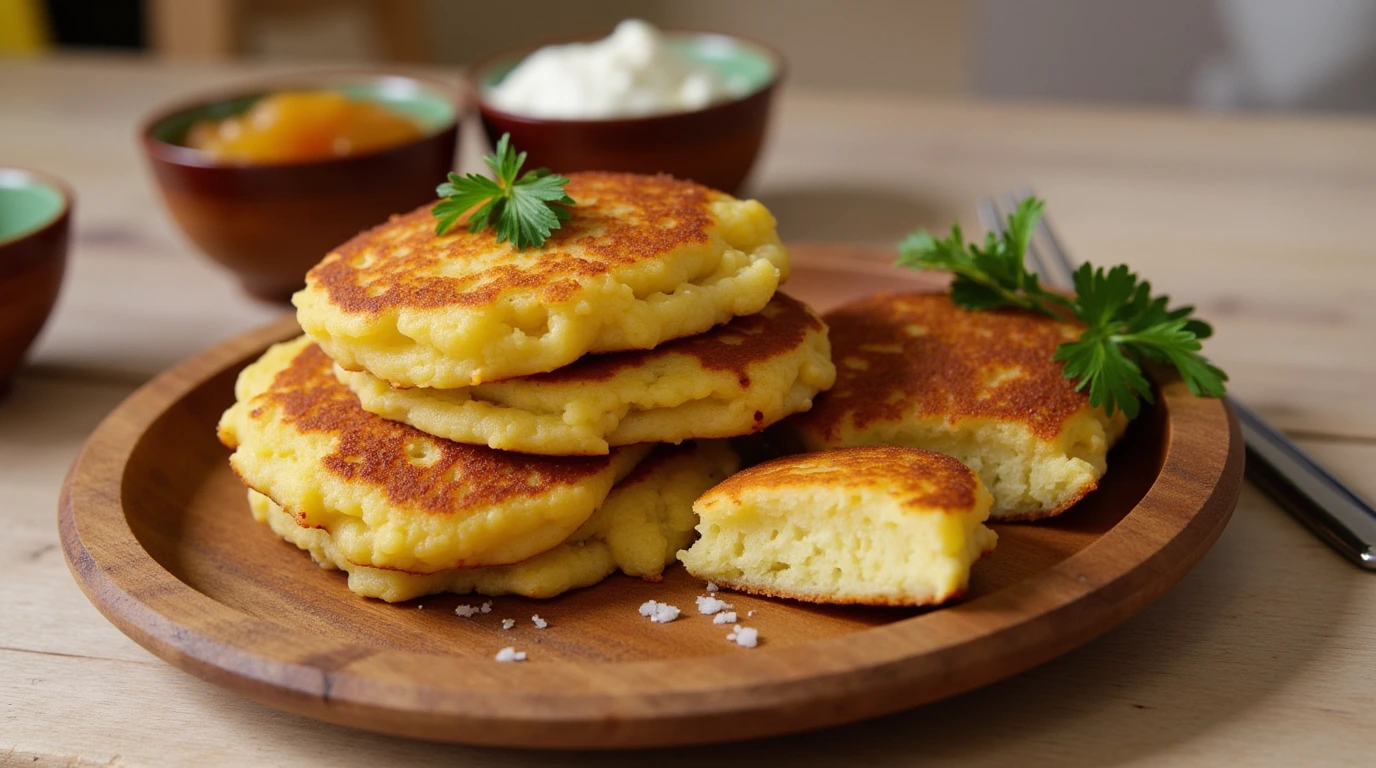
Potato pancakes are a timeless classic, but when made gluten free, they cater to everyone without sacrificing flavor or texture. These golden, crispy pancakes are versatile enough for breakfast, lunch, or dinner. With a few tweaks, they can fit various diets, including vegan or low-carb.
For another twist on traditional recipes, explore this guide to healthy gluten free breakfast cakes. And if you’re a fan of easy recipes, don’t miss the quick gluten free breakfast casserole.
Why Gluten Free Potato Pancakes Are a Must-Try
Potato pancakes are a classic dish that transcends cultures and occasions, and making them gluten free ensures they can be enjoyed by everyone. Whether you’re cooking for yourself, family, or guests with dietary restrictions, gluten free potato pancakes offer something for everyone.
1. Naturally Gluten Free
- These pancakes use gluten free flours like almond, rice, or chickpea flour, making them safe and suitable for individuals with celiac disease or gluten sensitivities.
- Unlike many gluten free substitutes, the texture of potato pancakes is naturally crispy and satisfying, eliminating the need for complex replacements.
- They’re made from simple, wholesome ingredients that are readily available, ensuring a fuss-free experience in the kitchen.
2. Customizable Flavors
The beauty of potato pancakes lies in their adaptability:
- Savory Options: Enhance the batter with herbs like dill, parsley, or thyme, or mix in grated Parmesan or nutritional yeast for a cheesy kick.
- Sweet Variations: Swap white potatoes for sweet potatoes and add a pinch of cinnamon or nutmeg for a subtly spiced, sweet version.
- Fusion Ideas: Incorporate global flavors like curry powder, paprika, or cumin to give your pancakes an international twist.
These customizations make potato pancakes a versatile dish that can be tailored to any palate or occasion.
3. Versatile Serving Options
- Traditional Pairings: Serve with classic toppings like sour cream, applesauce, or a sprinkle of green onions.
- As a Side Dish: Pair with roasted vegetables, grilled meats, or fish for a complete meal.
- Creative Applications: Use them as a base for avocado toast, smoked salmon, or even as a gluten free alternative to burger buns.
These pancakes also work wonderfully as a replacement for hash browns in breakfast spreads, offering a unique texture and flavor. For more ideas to inspire your breakfast table, explore this recipe for gluten free breakfast pastries.
4. Easy to Prepare
- Unlike some gluten free dishes that require complicated substitutions, these pancakes rely on straightforward ingredients and simple techniques.
- The batter comes together in minutes, and cooking them in small batches ensures consistent results every time.
- They’re beginner-friendly and forgiving, making them an excellent choice for novice cooks or those new to gluten free cooking.
5. Nutritional Benefits
- Potatoes are rich in vitamin C, potassium, and other essential nutrients, making these pancakes as nourishing as they are tasty.
- Using almond or chickpea flour adds protein and healthy fats, making the pancakes more filling and nutritious.
- By adjusting the oil and cooking method (e.g., baking or air-frying), you can make them lower in fat while still maintaining their crispiness.
Whether you’re looking for a satisfying gluten free breakfast, a savory side dish, or a creative base for gourmet toppings, gluten free potato pancakes are the answer. Their versatility, ease of preparation, and endless flavor possibilities make them a must-try for any home cook.
Ingredients for Gluten Free Potato Pancakes

Core Ingredients
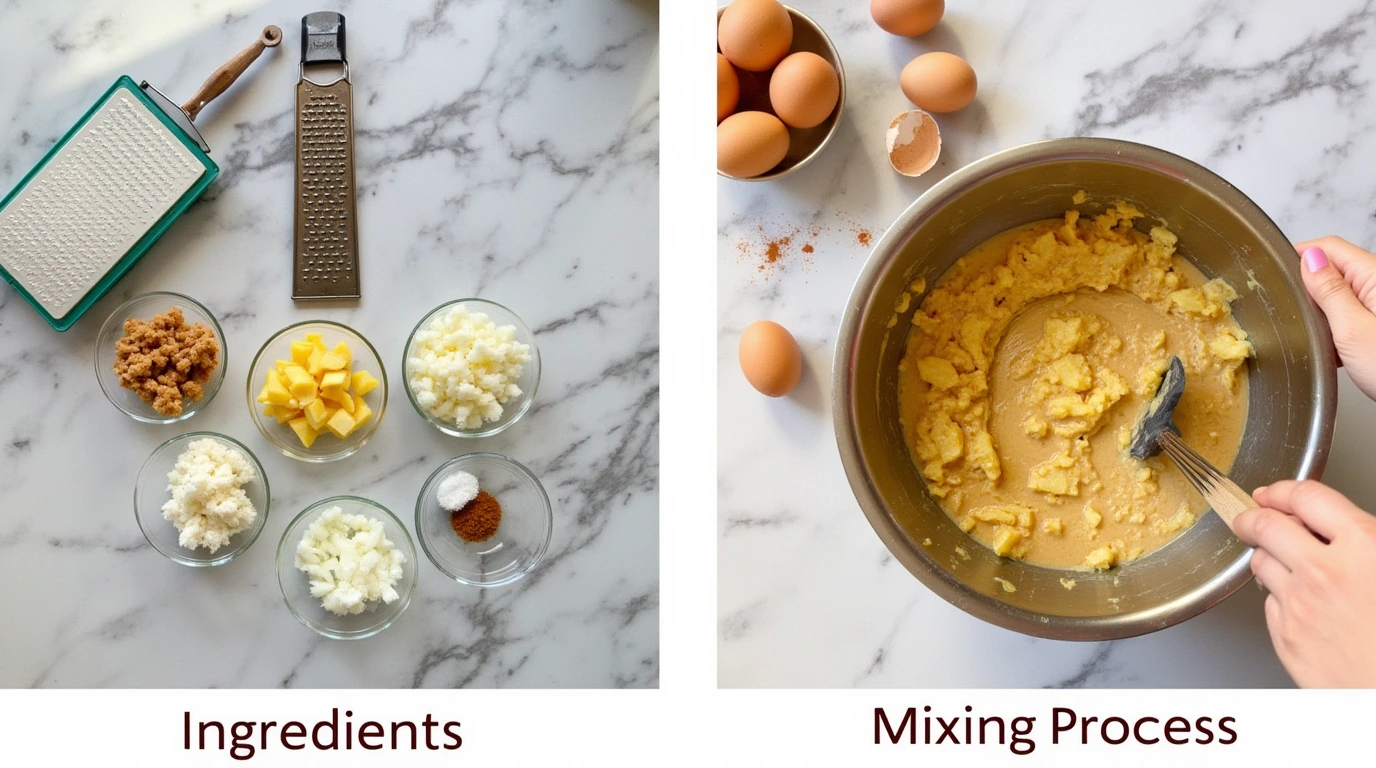
- 2 cups grated potatoes (white, golden, or sweet)
- 1 small onion, grated
- 3 tablespoons gluten free flour (almond, rice, or chickpea flour)
- 1 teaspoon salt
- Pepper, to taste
Wet Ingredients
- 2 large eggs, beaten (or flaxseed slurry for a vegan option)
- 1 tablespoon milk (dairy or plant-based, optional)
For Cooking
- ¼ cup oil (avocado or canola oil for frying)
Step-by-Step Instructions
1. Prep the Ingredients
- Grate the potatoes and onion. Place them in a kitchen towel and squeeze out the excess liquid to ensure crispy pancakes.
- Combine the potatoes and onions in a large bowl.
2. Make the Batter
- Add the gluten free flour, salt, pepper, and eggs to the bowl. Stir until evenly combined. Add milk if the batter seems too dry.
For a guide to working with gluten free ingredients, visit this article on baking with gluten free flour.
3. Cook the Pancakes
- Heat oil in a skillet over medium heat.
- Scoop 2 tablespoons of batter and flatten it into a pancake shape in the skillet.
- Cook for 3–4 minutes on each side until golden and crispy.
4. Serve
- Transfer to a paper towel-lined plate to drain excess oil. Serve hot with your choice of toppings.
Customizations and Serving Ideas
Flavor Variations
- Herb-Infused Pancakes: Add dill, parsley, or chives for a fresh twist.
- Sweet Potato Pancakes: Swap regular potatoes with sweet potatoes for a sweeter flavor.
- Cheesy Pancakes: Incorporate Parmesan or shredded mozzarella for a rich, cheesy taste.
Serving Suggestions
- Pair with sour cream and chives for a classic take.
- Add a dollop of applesauce for a sweeter, comforting option.
- Use as a base for poached eggs or smoked salmon for a gourmet breakfast.
For more sweet or savory breakfast options, you might enjoy gluten free banana pancakes.
Storage and Reheating Tips for Gluten Free Potato Pancakes
Proper storage and reheating techniques ensure your gluten free potato pancakes stay fresh, flavorful, and crispy. Whether you’re making them ahead for a quick meal or freezing leftovers for later, these tips will help maintain their texture and taste.
Short-Term Storage
For pancakes you plan to enjoy within a few days:
- Cool Completely: Let the pancakes cool fully on a wire rack to prevent condensation, which can make them soggy.
- Airtight Container: Place the cooled pancakes in an airtight container or resealable silicone bag.
- Refrigerate: Store in the refrigerator for up to 3 days.
Tip: To prevent sticking, layer the pancakes with parchment paper inside the container.
Freezing for Long-Term Storage
If you’ve made a large batch or want to prepare ahead:
- Cool the Pancakes: Ensure they’re completely cooled to avoid freezer burn.
- Layer with Parchment Paper: Place a sheet of parchment paper between each pancake to prevent sticking.
- Resealable Freezer Bag: Transfer the layered pancakes into a resealable freezer-safe bag.
- Label and Date: Write the freezing date on the bag to track freshness. Pancakes can be frozen for up to 3 months.
Tip: For maximum freshness, remove as much air as possible from the freezer bag before sealing.
Reheating Methods
Reheating potato pancakes properly is key to restoring their crispy exterior and tender interior:
Oven Reheating (Best for Crispiness)
- Preheat the oven to 375°F (190°C).
- Arrange the pancakes in a single layer on a baking sheet lined with parchment paper.
- Heat for 10–12 minutes, flipping halfway through for even crispiness.
Tip: For extra crispiness, lightly brush the pancakes with oil before reheating.
Skillet Reheating (Quick and Crispy)
- Heat a non-stick skillet over medium heat and add a small amount of oil.
- Place the pancakes in the skillet and cook for 2–3 minutes per side, until heated through and crispy.
Tip: Avoid overcrowding the skillet to maintain the desired texture.
Microwave Reheating (Convenient, But Less Crispy)
- Place a pancake on a microwave-safe plate and cover with a damp paper towel to prevent drying out.
- Microwave on medium power for 20–30 seconds or until heated through.
Note: While the microwave is the quickest method, it won’t maintain the crispiness of the pancakes.
Pro Tips for Freshness and Flavor

- Avoid Sogginess: Always allow pancakes to cool completely before storing, as trapped moisture can affect their texture.
- Reviving Crispiness: If reheated pancakes aren’t as crispy as you’d like, broil them in the oven for 1–2 minutes for a quick refresh.
- Separate Add-Ins: If you’re using toppings like cheese or applesauce, store them separately and add after reheating.
With these storage and reheating tips, your gluten free potato pancakes will taste as fresh and delicious as the day you made them. Whether for a quick breakfast or a prepared meal, you’ll have crispy, golden pancakes ready whenever you need them!
Frequently Asked Questions (FAQs) About Gluten Free Potato Pancakes
Got questions about making the perfect gluten free potato pancakes? Here are the answers to common queries to ensure your pancakes turn out crispy, delicious, and suited to your dietary preferences.
Can I Bake These Instead of Frying?
Yes, baking is a fantastic alternative to frying, especially if you’re looking for a healthier option:
- Preheat the Oven: Set the oven to 400°F (200°C).
- Prepare the Baking Sheet: Line a baking sheet with parchment paper and lightly brush or spray the surface with oil.
- Assemble the Pancakes: Scoop and flatten the batter into pancake shapes, spacing them evenly on the baking sheet.
- Bake: Bake for 20–25 minutes, flipping the pancakes halfway through to ensure even browning.
Tip: For extra crispiness, broil the pancakes for 1–2 minutes at the end of the baking time.
Can I Use a Different Flour?
Absolutely! Gluten free potato pancakes are highly adaptable, and you can experiment with different flours to achieve the desired texture and flavor:
- Almond Flour: Provides a nutty flavor and light texture, ideal for savory pancakes.
- Rice Flour: A neutral option that works well as a binding agent without altering the flavor.
- Chickpea Flour: Offers an earthy, slightly nutty taste and is excellent for binding, making it a great choice for vegan versions.
- Cornstarch or Potato Starch: These work well for an extra crispy texture but should be combined with another flour for structure.
Pro Tip: When experimenting with new flours, adjust the liquid quantities slightly to ensure the batter isn’t too wet or too dry.
How Do I Ensure Crispy Pancakes?
Achieving the perfect crispy texture requires attention to detail during preparation and cooking:
- Squeeze Out Excess Liquid: After grating the potatoes and onions, use a clean kitchen towel to squeeze out as much liquid as possible. This step prevents sogginess and ensures the batter holds together well.
- Use Enough Oil: When frying, ensure the skillet has a thin but sufficient layer of oil. Insufficient oil can cause sticking and uneven cooking.
- Avoid Overcrowding the Pan: Cook pancakes in small batches to maintain the oil’s temperature, ensuring even crispiness.
- Maintain Heat Control: Fry over medium heat. Too high, and the pancakes might burn; too low, and they’ll absorb too much oil without crisping.
For more tips on mastering breakfast dishes, explore this recipe for overnight gluten free casseroles, perfect for pairing with potato pancakes.
These FAQs should help you perfect your gluten free potato pancakes, whether you’re baking, experimenting with different flours, or aiming for ultimate crispiness. With these tips in mind, you’re set to enjoy this versatile and crowd-pleasing dish!
Gluten free potato pancakes are the perfect combination of crispy, flavorful, and easy to customize. Whether you serve them as a side dish or the main event, this recipe is a surefire hit. Enjoy experimenting with the endless customization options and creating a meal everyone will love!

